Are you curious about Stable Diffusion? If you’re a novice who hasn’t had any exposure to Stable Diffusion or other AI-driven image creators, this Stable Diffusion primer is designed specifically for you.
This guide offers a concise understanding of Stable Diffusion and shares quite a few fundamental tips to help you get started.
Don’t forget to take a test drive with the Stable Diffusion AI available right here on this page. It’s undoubtedly the most effective learning method!
Contents
- 1 What Exactly is Stable Diffusion?
- 2 How to Utilize Stable Diffusion? Examples of Prompt Variations and Results
- 3 What Sets Stable Diffusion Apart from Other AI Image Generators?
- 4 Is Stable Diffusion Available for Free? How Much Does Stable Diffusion Cost?
- 5 Experience the Stable Diffusion Online FREE Demo
- 6 What are the Capabilities of Stable Diffusion?
- 6.1 Mastering the Art of Text-to-Image Generation with Stable Diffusion
- 6.2 Text-to-Image Generation with Stable Diffusion
- 6.2.1 Create Anime Style Images With this Stable Diffusion Prompt:
- 6.2.2 Create an Image in Photorealistic Style using this Stable Diffusion Prompt
- 6.2.3 Create Landscape Imagery with Stable Diffusion
- 6.2.4 Create a Fantasy Image with Stable Diffusion
- 6.2.5 Build AI Images in Artistic Style using Stable Diffusion
- 6.2.6 Use Stable Diffusion to Create Animal Imagery
- 6.3 Transforming an Existing Image using Stable Diffusion (Creating an image from an image)
- 6.4 Photo Editing with Stable Diffusion
- 6.5 Stable Diffusion Video Creation and Manipulation
- 7 Creating Effective Prompts for Stable Diffusion
- 8 Understanding and Adjusting Stable Diffusion Parameters
- 9 How Many Images Should You Generate When Using Stable Diffusion?
- 10 Addressing Imperfections in First-Stage Stable Diffusion Images
- 11 Correcting Imperfections with Inpainting
- 12 Understanding Stable Diffusion Custom Models
- 13 Producing Large-Scale Prints with Stable Diffusion
- 14 Mastering and Controlling Image Composition with Stable Diffusion
- 15 Crafting Specific Subjects with Stable Diffusion
- 16 Dive Ever so Deeper into the World of Stable Diffusion: A Comprehensive Guide for Beginners (and Professionals)
- 17 What is Stable Diffusion?
- 18 Why Choose Stable Diffusion?
- 19 The Power of Stable Diffusion: What Can It Do?
- 20 Frequently Asked Questions about Stable Diffusion Quick Start Guide
- 20.1 Q1: What is Stable Diffusion?
- 20.2 Q2: How do I build a good prompt for Stable Diffusion?
- 20.3 Q3: What parameters can I change in Stable Diffusion?
- 20.4 Q4: How many images should I generate when testing a prompt?
- 20.5 Q5: How do I fix defects in the images generated by Stable Diffusion?
- 20.6 Q6: What are custom models in Stable Diffusion?
- 20.7 Q7: What is a negative prompt in Stable Diffusion?
- 20.8 Q8: Can I use Stable Diffusion to create large print images?
- 20.9 Q9: Can I control the composition of the image with Stable Diffusion?
- 20.10 Q10: What are some common subjects I can generate with Stable Diffusion?
- 20.11 Q11: Can Stable Diffusion generate anime-style visuals?
- 20.12 Q12: How can I train a new model with Stable Diffusion?
- 20.13 Q13: Can Stable Diffusion create photorealistic images?
- 20.14 Q14: Can I control the lighting in the images generated by Stable Diffusion?
- 20.15 Q15: Can I use Stable Diffusion to generate images from an artist’s style?
- 20.16 Q16: How can I make a large print with Stable Diffusion?
What Exactly is Stable Diffusion?
Stable Diffusion AI represents an innovative approach in the vast field of artificial intelligence applied in image creation and image manipulation. It’s a latent diffusion model designed for the creation of AI-based images. Its capabilities encompass producing images that bear striking resemblances to those taken with a camera, thereby depicting a high degree of photorealism. This feature is especially beneficial for applications that require images of the highest quality possible.
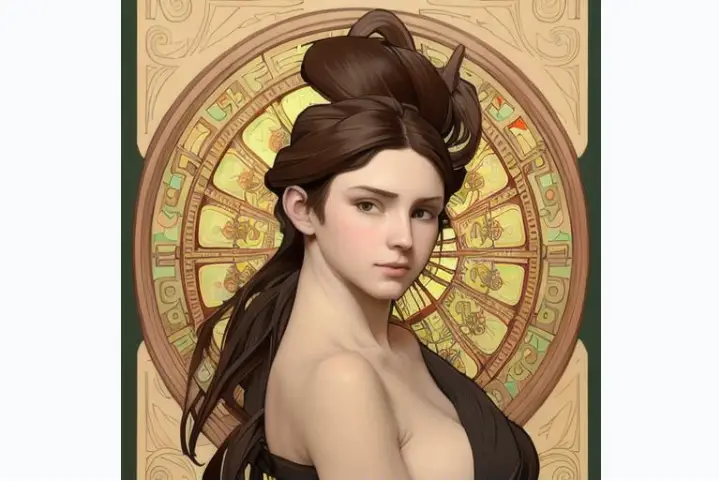
In addition, Stable Diffusion AI isn’t limited to generating purely photorealistic images. It can also mimic the stroke of a paintbrush or the shade of a pencil sketch, providing an artistic flair akin to what you might see in a gallery or museum. Imagine having the ability to create stunning visuals that would otherwise require the skills of a professional artist – all at your fingertips.
One of the most appealing aspects of Stable Diffusion AI is its cost-effectiveness. You don’t need to worry about a hefty price tag or subscription fees since this tool is available for free. All you need is a personal computer, and you’re ready to dive into the world of AI-driven image creation. The freedom to run it on your PC also gives you the convenience to operate the AI from the comfort of your own home, allowing for a user-friendly experience that’s both easy and enjoyable.
Stable Diffusion AI brings together the power of AI and the beauty of imagery in a user-friendly, cost-effective package, offering endless possibilities for creativity and innovation.
How to Utilize Stable Diffusion? Examples of Prompt Variations and Results
Using Stable Diffusion AI is a straightforward process, allowing even the most inexperienced users to create unique and detailed images with ease. Here’s a simple step-by-step guide:
Start by giving Stable Diffusion a descriptive prompt – this should be an elaborate image description. The more specific your instructions, the more accurately the AI will interpret and execute your vision.
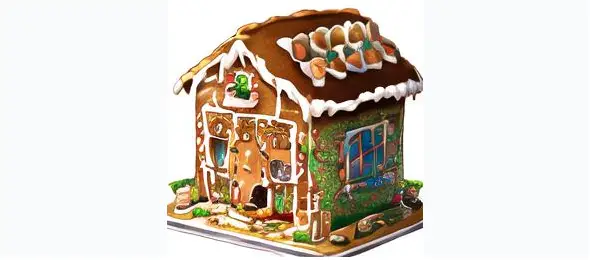
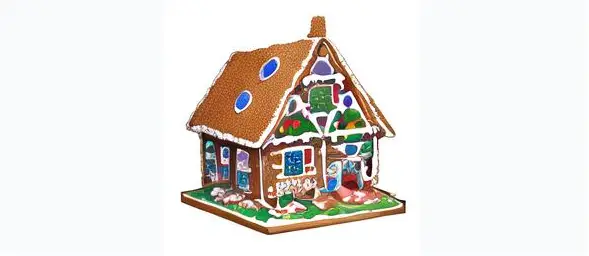
For instance, consider the following example: “Gingerbread house, diorama, in focus, white background, toast, crunch cereal“
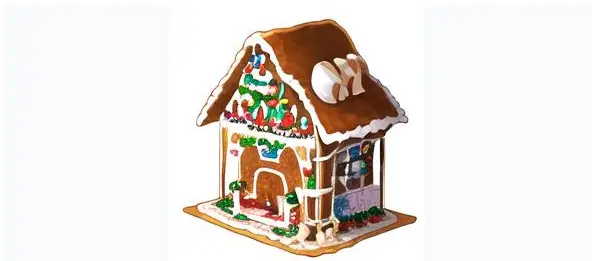
Upon receiving your instructions, Stable Diffusion uses its sophisticated AI capabilities to convert your text prompt into a visual representation. The end result is an array of images that accurately align with your given description, such as the ones displayed below.
Another intriguing feature of Stable Diffusion is its ability to generate multiple interpretations of the same prompt. This means that you can generate several unique variations from a single instruction set. So, feel free to experiment and generate as many iterations as you desire.
Here are a few more variations of the prompt we tried:
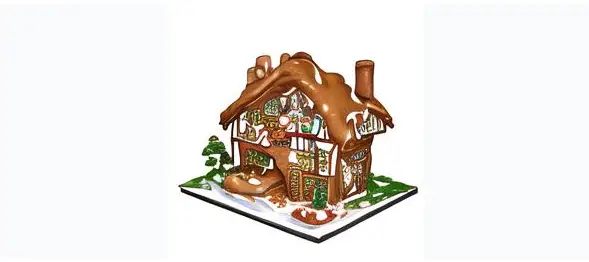
“A detailed diorama featuring a gingerbread house as the central element. The house is surrounded by a landscape made of toast and crunch cereal. Everything is perfectly in focus, and the backdrop is an unblemished white.“
“An up-close, in-focus image of a gingerbread house. The house is crafted with elements of toast and crunch cereal, offering a unique twist on the traditional gingerbread house design. The diorama is staged against a pure white background, providing a contrast that makes the gingerbread house stand out.“
Remember, the more detailed and descriptive your prompt, the better the output will be. So, don’t hesitate to be imaginative and specific with your instructions. The Stable Diffusion AI is here to bring your creative visions to life!
“A gingerbread house, designed in the style of a diorama, is the central focus of the image. The house is surrounded by a scenery made from toast and crunch cereal, giving the impression of a quirky edible landscape. All elements are in focus against a pristine white background.“
What Sets Stable Diffusion Apart from Other AI Image Generators?
While there are several text-to-image generation services available, including DALL-E and MidJourney, Stable Diffusion has distinct advantages that make it an attractive choice for many. Here’s why you might want to consider Stable Diffusion:
Stable Diffusion is Open Source:
Unlike some other platforms, Stable Diffusion is open-source. This means that it’s not just a service provided by a specific company or individual – it’s a collective project that benefits from the contributions of AI enthusiasts from around the globe.
As a result, many users have already created and shared a multitude of free tools and models, continually expanding and enriching the platform’s capabilities.
Efficient Design for Low-Power Computers:
Stable Diffusion has been thoughtfully designed to run effectively even on low-power computers. This is a key advantage, particularly for individuals or small businesses that may not have access to high-end computing resources. Despite its power efficiency, Stable Diffusion delivers exceptional performance and high-quality image generation.
This makes the platform not only easily accessible but also affordable to run, as it either comes free of cost or requires minimal operational expenditure.
In essence, Stable Diffusion’s open-source nature and efficient design make it a uniquely inclusive and user-friendly option in the realm of AI-driven image generation. It’s a prime example of the democratization of advanced technology, bringing cutting-edge AI capabilities to users regardless of their resources or expertise.
Is Stable Diffusion Available for Free? How Much Does Stable Diffusion Cost?
Indeed, Stable Diffusion is accessible for free when you run it on your own computer, and it can cost you nothing. You can run it on a Windows or Mac operating system. This allows you to leverage the AI’s capabilities without incurring any direct cost while using it on your own device.
However, it’s important to note that if you’re using an online service to access Stable Diffusion, there may be a modest fee involved. The reason behind this is that the service providers have to maintain and provide the necessary hardware infrastructure for the AI to operate on, and these operational costs are often transferred to the users in the form of fees.
But generally, these charges are quite affordable, keeping the use of Stable Diffusion within reach for most people.
Experience the Stable Diffusion Online FREE Demo
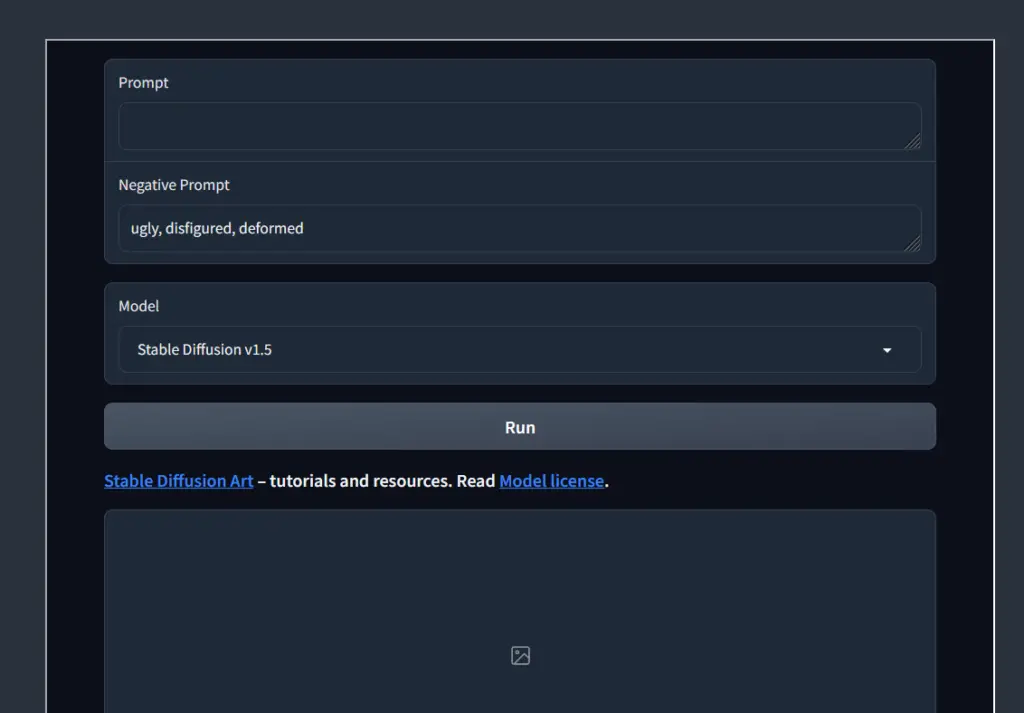
To truly appreciate the potential of Stable Diffusion, it’s highly beneficial to engage with it directly. Below, you’ll find the Stable Diffusion image generator for you to experiment with.
Simply follow these four uncomplicated steps:
First, Visualize: Initiate the process by closing your eyes and envisaging the image you want to bring to life.
Then, focus on Detailing: Describe the visual you’ve imagined with as much detail as possible. The more elaborate your description, the more precise the resulting image will be. Focus not just on the main subject, but also consider the peripheral elements and background.
Apply Proper Prompt Creation: Next, convert your detailed description into a written prompt. Use a plethora of descriptive words to provide a comprehensive visualization.
Finally, focus on your Input: Lastly, input your well-crafted description into the prompt input box provided below.
Leave the ‘negative prompt’ unchanged. This demo provides an exciting opportunity to explore the potential of Stable Diffusion – don’t be shy to let your imagination roam freely. It’s time to see your creativity brought to life by AI!
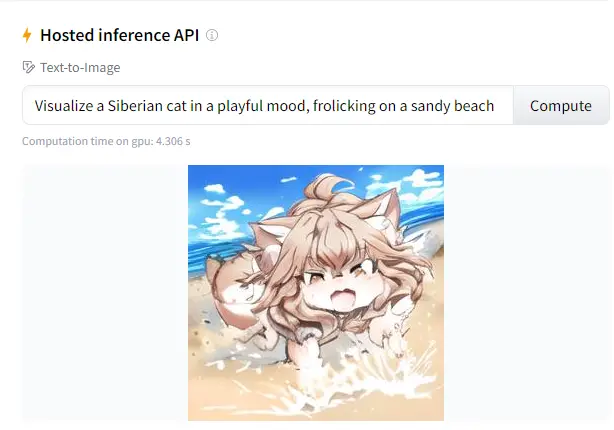
In your journey with Stable Diffusion, consider trying out these easy-to-follow prompts:
“Visualize a Siberian cat in a playful mood, frolicking on a sandy beach”
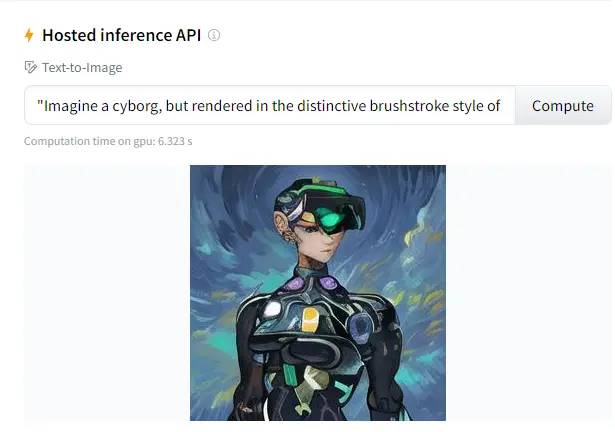
“Imagine a cyborg, but rendered in the distinctive brushstroke style of the iconic painter Van Gogh”
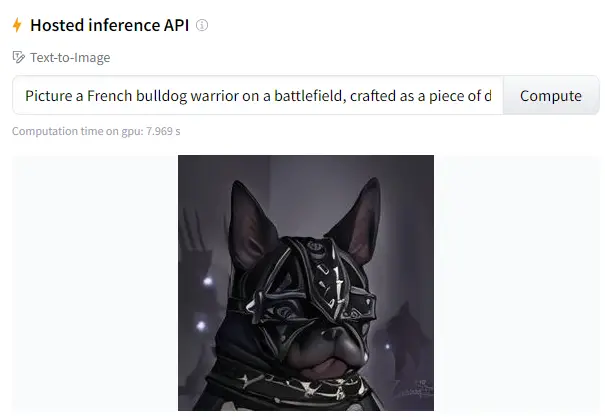
“Picture a French bulldog warrior on a battlefield, crafted as a piece of digital art. Aim for an aesthetic portrayal with intricate details, a face full of detail, closed eyes depicted hyper-realistically, a Zorro-style eye mask, and ambient lighting, evoking the quality of artworks seen on ArtStation”
Adjust the model settings as you experiment to understand how they influence the final output. As you delve deeper into this guide, you’ll gain a broader understanding of the various models available.
- Stable Diffusion v1.5: This is your foundational model, offering versatility in creating diverse styles.
- Realistic Vision v2.0: This model excels at crafting images with a strong photorealistic touch.
- Anything v3.0: This is your go-to for creating visuals in an Anime-style.
You’ll find that sometimes the results align with your vision, while at other times, they may deviate. This is part of the creative process in the world of AI. There are several techniques to enhance your generated images, which we’ll uncover as we progress. So, keep exploring and let your creativity run wild!
What are the Capabilities of Stable Diffusion?
Stable Diffusion can accomplish a variety of tasks within the realm of image generation, driven primarily by text descriptions.
Mastering the Art of Text-to-Image Generation with Stable Diffusion
At the heart of Stable Diffusion lies a powerful feature – the ability to convert text descriptions into corresponding image representations. It can transform a unique text prompt like “an astronaut riding a horse on the moon” into a vivid, detailed image.
However, producing an image that precisely matches your imagination can be a bit challenging. The key to success involves effectively leveraging specific keywords that the model has been trained on. This strategic use of keywords can guide the model to deliver the desired output.
Top Three Strategies for Crafting Effective Prompts
Strategy 1: Embrace Detail and Specificity
When describing your subject, it’s crucial to be as detailed and specific as possible. The clarity of your description significantly influences the accuracy of the resulting image. For instance, a generic statement like “a woman sitting” is too vague and open to interpretation. Instead, a detailed description like “a beautiful woman with blue eyes and blonde hair sitting outside in a sunlit cafe” provides a much clearer picture for the model to work with.
Strategy 2: Leverage Artist Names and Websites for Style Direction
If you’re looking to guide the stylistic direction of the image, consider using the names of artists or websites recognized for their distinctive styles.
Rather than stating “digital art” which doesn’t provide a clear style direction, a more specific instruction would be “digital art, reminiscent of works found on ArtStation, or those created by renowned artists like Artgerm or Alphonse Mucha“.
This provides a clear stylistic reference for the model.
Strategy 3: Incorporate Lighting Descriptions for Visual Impact
Including descriptions related to lighting can significantly enhance the visual appeal of the generated image. Terms like “cinematic lighting”, “studio lighting”, or “sunlight” can add a dramatic layer to your image, imbuing it with a sense of realism and depth.
Additional Tip: To truly tap into a prompt’s potency, always generate multiple images using the same prompt. This practice offers a broader view of the various interpretations of the prompt by the model, helping you refine it for optimal results.
Remember, mastering Stable Diffusion is a journey of exploration and constant learning. The more you experiment and play with different prompts and keywords, the closer you get to creating the perfect image from your imagination. Happy creating!
Here are some key capabilities of this AI tool to help you with your AI creations when using Text to Image Stable Diffusion Prompts:
Text-to-Image Generation with Stable Diffusion
The fundamental function of Stable Diffusion is to translate text prompts into images (txt2img). By just feeding a detailed description, you can create a wide range of images, examples of which include:
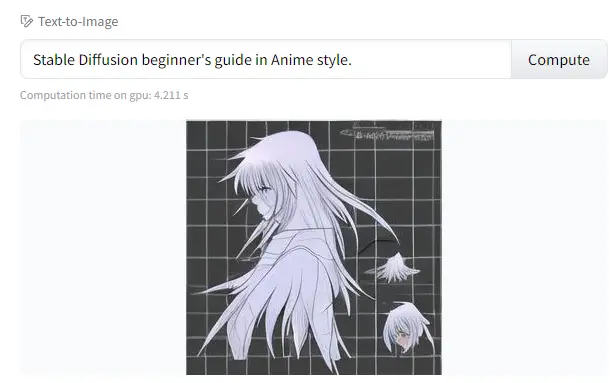
Create Anime Style Images With this Stable Diffusion Prompt:
Want to create your own anime characters or scenes? Stable Diffusion can do that. You can start by trying to generate an image for the ‘Stable Diffusion beginner’s guide in Anime style.’
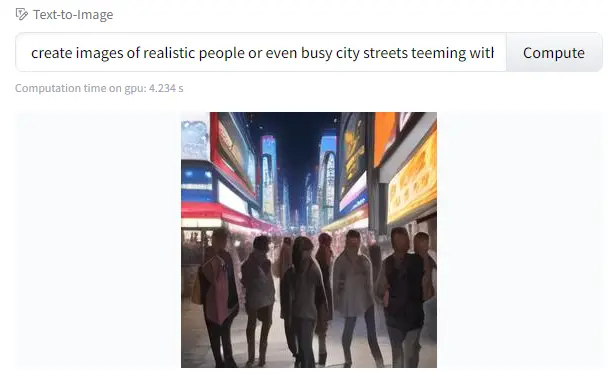
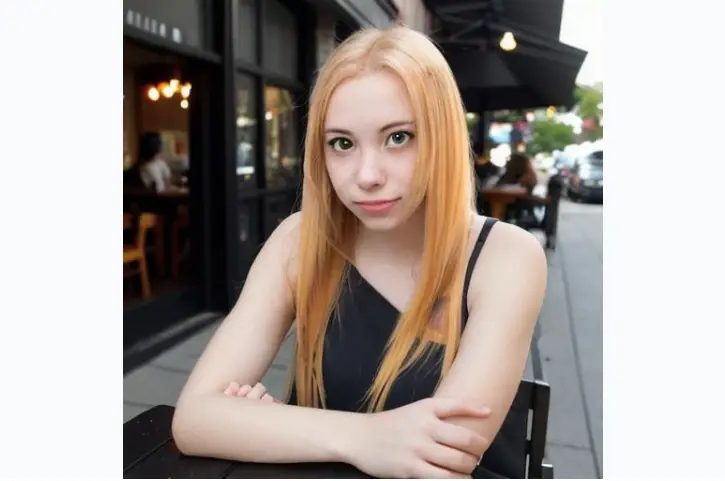
Create an Image in Photorealistic Style using this Stable Diffusion Prompt
If you are aiming for images that mirror real-life visuals, Stable Diffusion is up to the task. You can create images of realistic people or even busy city streets teeming with life.
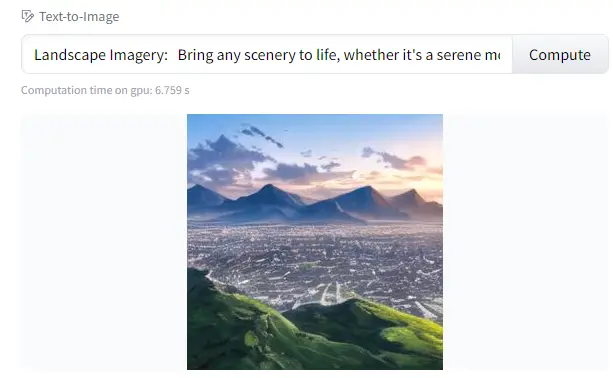
Create Landscape Imagery with Stable Diffusion
Bring any scenery to life, whether it’s a serene mountain landscape or a vibrant city skyline.
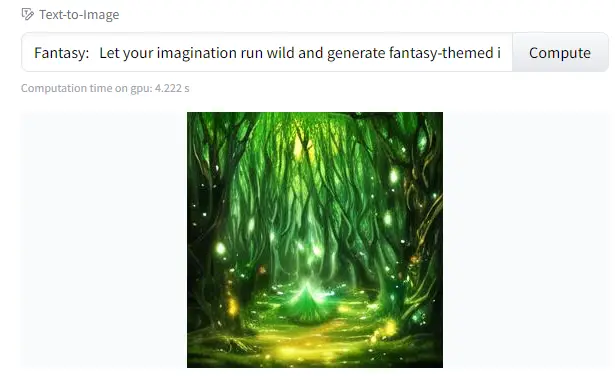
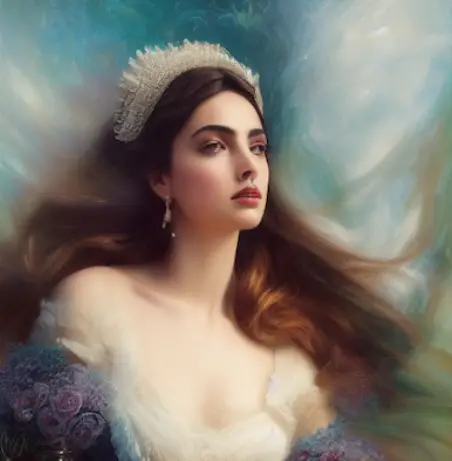
Create a Fantasy Image with Stable Diffusion
Let your imagination run wild and generate fantasy-themed images. An example could be a ‘realistic princess in a mystical forest.’
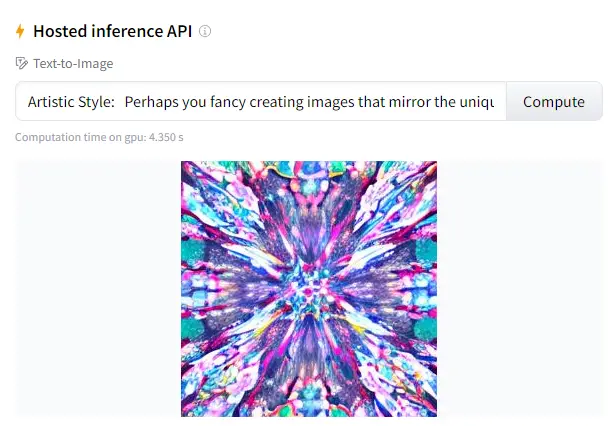
Build AI Images in Artistic Style using Stable Diffusion
Perhaps you fancy creating images that mirror the unique styles of famous artists or general artistic aesthetics. Stable Diffusion can help you transform simple prompts into pieces of art.
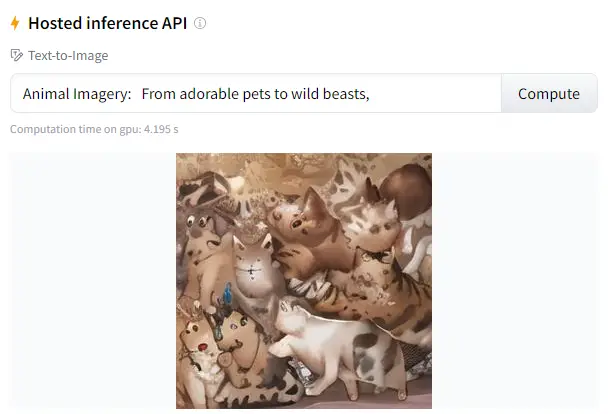
Use Stable Diffusion to Create Animal Imagery
From adorable pets to wild beasts, Stable Diffusion can generate a range of animal images based on your descriptions.
Remember, the key to successful image generation is detailed and specific prompts. So, don’t hold back on the descriptors when trying to create your perfect image. The tool we used for this Stable Diffusion demo is available here.
Transforming an Existing Image using Stable Diffusion (Creating an image from an image)
The image-to-image (img2img) feature enables Stable Diffusion to morph one image into another. For instance, you can take a simple drawing of an apple and use Stable Diffusion to transform it into a photo-realistic representation of the fruit.
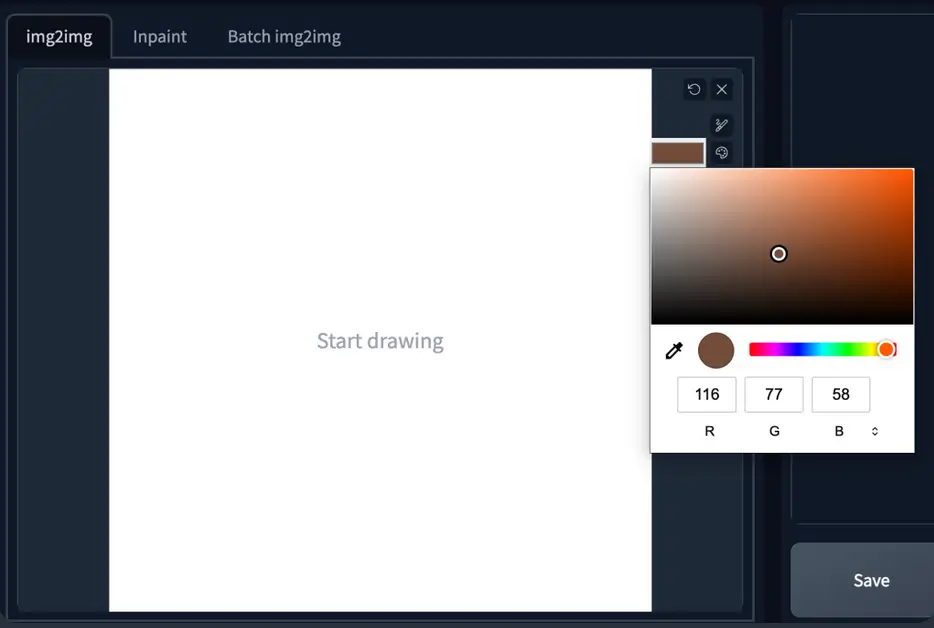
This transformation relies on both the input image and the given prompt to produce the desired output.
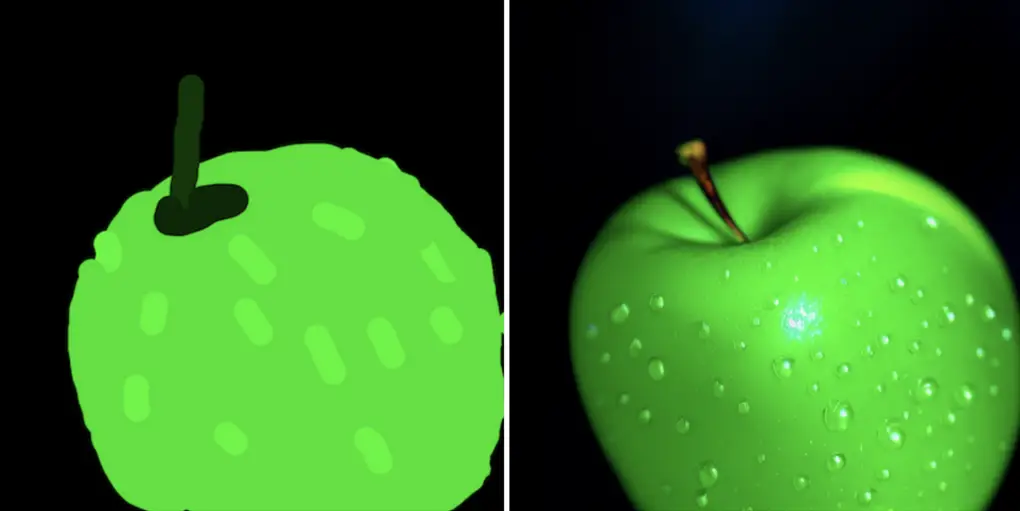
Photo Editing with Stable Diffusion
Stable Diffusion’s capabilities extend to the realm of photo editing as well. It offers a feature similar to Photoshop’s ‘Content-Aware Fill’, which is used for inpainting, or regenerating parts of an AI or real image. The advantage? You get to leverage this functionality for free!
Stable Diffusion Video Creation and Manipulation
Stable Diffusion can also be employed to create captivating videos in two main ways:
- From a Text Prompt:
Deforum is a popular method to create videos from a text prompt using Stable Diffusion. You might have come across such videos on social media platforms, where the output looks like a dynamic transformation of the text prompt into a visual representation. - From Another Video:
You can also stylize an existing video with Stable Diffusion. This technique essentially applies a unique aesthetic or style to your video, akin to applying a filter to an image. Check out the video-to-video tutorial to learn more.
Creating animations using Stable Diffusion is slightly more complex and best tackled once you have a good handle on the basic functionalities like text-to-image and image-to-image conversion. So start mastering those, and soon you’ll be ready to dive into the exciting world of AI-generated videos and animations! Try Deforum – you’re gonna have loads of fun.
Creating Effective Prompts for Stable Diffusion
Curious about crafting effective prompts for Stable Diffusion? There’s indeed much to master. The key, however, is to portray your subject with as much precision as possible, incorporating potent keywords to establish the desired style. We have a separate guide on that topic, but here are a few tips, tricks and guidelines on creating Stable Diffusion Prompts.
Leveraging a prompt generator can be an invaluable method to acquire a step-by-step understanding and discover crucial keywords. For beginners, it’s vital to familiarize themselves with a repertoire of impactful keywords and their corresponding effects—akin to learning the vocabulary of a new language. A concise list of keywords and related notes can be found here.
A quick route to producing high-quality images is to repurpose existing prompts. Visit the prompt collection, choose an image that catches your eye, and borrow the prompt! The potential downside is that you might not grasp why it yields high-quality images. To overcome this, consider reading the notes and modifying the prompt to observe the effect.
Alternatively, consider using image collection platforms like Playground AI. Select an image that appeals to you and rework the prompt. However, be aware that locating a top-notch prompt might be akin to finding a needle in a haystack.
Remember, the prompt is merely a starting point. Feel free to adapt it to your specific requirements.
The Golden Rules for Crafting Effective Stable Diffusion Prompts
Formulating effective prompts for Stable Diffusion is an art that hinges on two fundamental principles:
Prioritize Detail and Precision
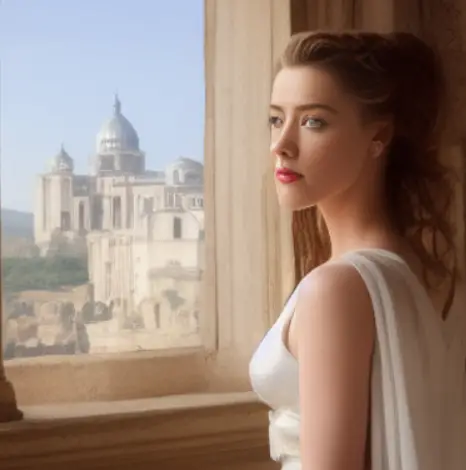
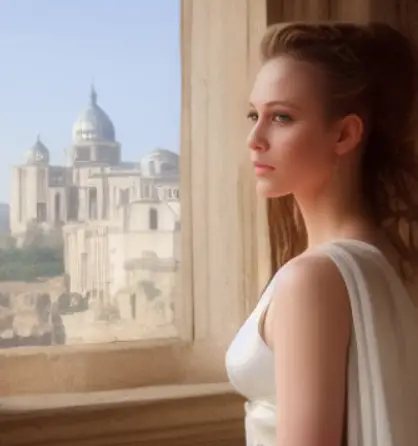
Even though artificial intelligence has made tremendous strides, Stable Diffusion isn’t yet capable of mind-reading. Hence, it becomes crucial for you to describe your desired image with as much detail as possible. For example, if you’re looking to generate an image of a woman in a cityscape, a simple prompt like “a woman on the street” might result in an image of an elderly lady, which might not align with your vision.

To obtain a more accurate image, consider a more detailed prompt like “a young lady with brown eyes, highlighted hair, and a bright smile, wearing stylish business casual attire, sitting in an outdoor setting on a quiet city street with rim lighting.” The difference in the output from these two prompts underscores the importance of precision in your prompt construction.
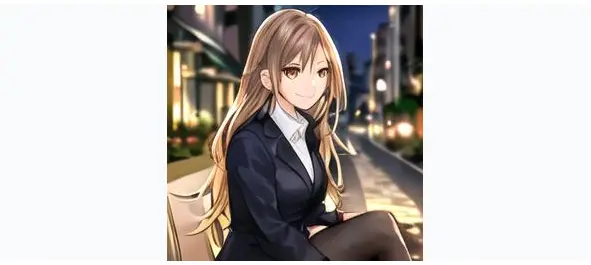
Notice the difference in the quality of Stable Diffusion outputs when applying a more precise prompt. It is pretty stunning, isn’t it?
Leverage Powerful Keywords
Certain keywords hold more sway than others. These could be celebrity names (like “Emma Watson”), artist names (like “van Gogh”), or art medium terms (like “illustration,” “painting,” or “photograph”). Using these potent keywords judiciously can steer the image-generation process in the direction you want.
Remember, creating prompts is like learning a new language – you need to familiarize yourself with the vocabulary, understand the syntax, and practice forming sentences. And, if you’re ever in a hurry, you can always turn to ChatGPT to generate prompts for you!
Be Detailed and Specific When Creating a Stable Diffusion Prompt
Despite the rapid advancements in AI, Stable Diffusion is not equipped to read your mind. It requires you to portray your desired image with utmost detail.
For instance, if your aim is to generate an image of a woman in a street setting, a simple prompt like “a woman on the street” might not suffice. The resulting image could be far from what you envisioned, but technically, it does match your prompt. So, the blame doesn’t lie with Stable Diffusion.
To achieve more accurate results, enrich your prompt. For example, “a young lady with brown eyes and highlights in her hair, smiling, dressed in stylish business casual attire, sitting outdoors on a quiet city street with rim lighting.” Notice the stark difference this makes. Therefore, refining your prompt-building skills is essential!
Use Powerful Keywords for Stable Diffusion Prompts
Certain keywords hold more power than others. These could be celebrity names like “Emma Watson,” artist names such as “Van Gogh,” or art mediums like “illustration,” “painting,” or “photograph.” When used judiciously, these keywords can guide image generation in the desired direction.
You can further broaden your understanding of prompt construction and sample keywords in the basics of building prompts. Looking for a shortcut? Just as you would with homework, you can employ ChatGPT or Agent-GPT to generate prompts for you!
Understanding and Adjusting Stable Diffusion Parameters
Most online generators provide the flexibility to alter a select set of parameters. Here are some significant ones you should be aware of:
- Image size:
This parameter determines the dimensions of the output image. The default size is typically 512×512 pixels. Modifying it to a portrait or landscape format can substantially influence the image. For instance, choosing a portrait size can help generate a full-body image. - Sampling steps:
It’s recommended to use a minimum of 20 steps. If the image appears blurry, consider increasing this number. - CFG scale:
The usual value for this is 7. If you wish for the image to adhere more closely to the prompt, you might want to increase this value. - Seed value:
A seed value of -1 yields a random image. If you want to generate a specific image, you should specify a value.
Remember, these parameters are tools at your disposal. Feel free to experiment and adjust them as per your requirements to get the best results.
How Many Images Should You Generate When Using Stable Diffusion?
When experimenting with a Stable Diffusion prompt, it’s highly recommended to generate several images.
When you’re making substantial modifications to a prompt, it’s efficient to generate between 2 to 4 images at once. This strategy accelerates the process of finding the most suitable results. If you’re making minor tweaks to the prompt, generating 4 images simultaneously can improve the probability of producing a satisfactory result.
Remember, some prompts may only yield desirable results less than half of the time. Therefore, it’s essential not to dismiss a prompt-based solely on a single generated image. Keep experimenting and iterating!
Addressing Imperfections in First-Stage Stable Diffusion Images
When you come across striking AI images on social media, it’s likely that these images have been refined through several post-processing stages. We’ll explore some of these methods in this section.
Perfecting Facial Imagery with Stable Diffusion
A challenge often observed within the world of AI artistry is the generation of immaculate facial images. More often than not, artists using Stable Diffusion have noticed the tendency for these AI-generated faces to exhibit certain artefacts, affecting the overall quality and realism of the output.
Fortunately, technology has provided a solution. Many AI artists have been turning to specialized AI image models that have been uniquely trained for the task of face restoration. One such model, known as CodeFormer, has gained popularity for its ability to effectively enhance the quality of facial images.
In fact, the developers behind the AUTOMATIC1111 GUI recognized the potential of CodeFormer and integrated this tool directly into their interface. This allows users to easily enhance their facial image outputs without needing to engage with complex processes or additional software. For those seeking to utilize this feature, user-friendly guidelines are available to guide you through the enabling process.
Moreover, in an effort to continually improve the quality of images produced, updates have been rolled out for the v1.4 and v1.5 models.

These updates specifically target and correct issues with the representation of eyes in the generated images, a crucial element in creating realistic facial depictions. Users can access these improvements by installing a Variational AutoEncoder (VAE), a powerful tool in the world of AI imagery.
Refining Image Quality with Stable Diffusion Inpainting
In the realm of AI image generation, obtaining a flawless image on the first try can often be akin to finding a needle in a haystack. A more feasible and widely adopted strategy involves first creating an image that possesses a strong overall composition.
Once this foundation is in place, the next step is to enhance the quality of the image by correcting any minor imperfections that may exist. This is where the technique of inpainting becomes invaluable.
Inpainting is a process that involves the modification and refinement of an image to improve its overall quality. It’s a powerful tool in the Stable Diffusion toolkit and can be effectively used to rectify a range of common issues – from smoothing out rough edges to correcting more complex facial features.
To illustrate this, consider an image before and after the application of inpainting. By utilizing the original prompt for inpainting, we find that this method is successful in enhancing the image in around 90% of instances. The image on the left demonstrates the original with noticeable defects, while the image on the right showcases the marked improvements made to the face and arm region using inpainting.
It’s worth noting that inpainting is just one of the many techniques available within Stable Diffusion to address and rectify various common issues in AI-generated images. For those eager to explore these additional methods and improve their AI image generation skills further, more detailed information on fixing common issues is readily available.
Correcting Imperfections with Inpainting
Achieving a perfect image in one go is quite rare. Hence, you can employ a tool called inpainting to fix any defects in your image. Inpainting allows Stable Diffusion to regenerate portions of the image, thereby improving its overall quality. For a comprehensive understanding of inpainting and its applications, you can refer to the ‘Inpainting Basics’ section.
Ready-to-Use Positive and Negative Stable Diffusion Prompts for Inpainting Exploration
Below, you’ll find a few pre-made prompts that you can try out. The aim is to showcase the capabilities of Stable Diffusion. Remember, you’re not required to use the same model – feel free to experiment with different ones to explore various styles.
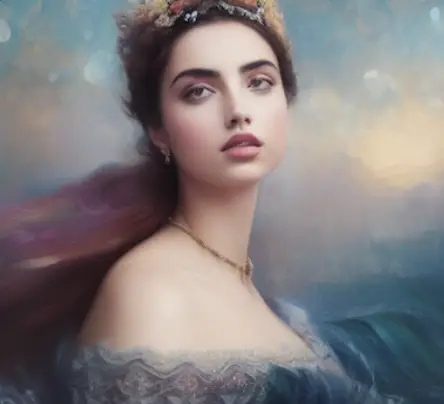
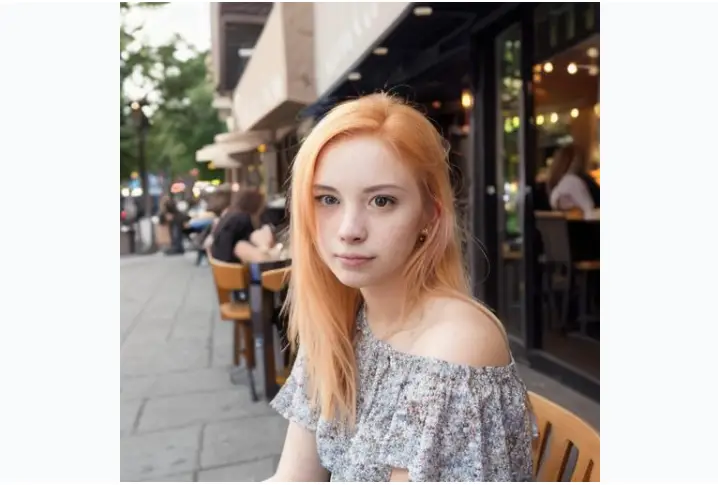
Crafting a Realistic Human Portrait of a Beautiful Young Woman
Prompt:
“Photographic image of a young woman with highlighted hair, sitting outside a restaurant. She’s wearing a dress, lit by rim lighting and studio lighting, and looking directly at the camera. The image should emulate the style of a high-quality DSLR shot, with sharp focus, depth of field, and a touch of film grain, reminiscent of a Fujifilm XT3 shot. It should be ultra-clear, 8K UHD quality, with highly detailed glossy eyes and visible skin pores.”
Negative Prompt:
“Avoid creating an image that is disfigured, ugly, bad, immature, cartoonish, anime-like, 3D, painted, or black and white.”
Recommended Model: F222
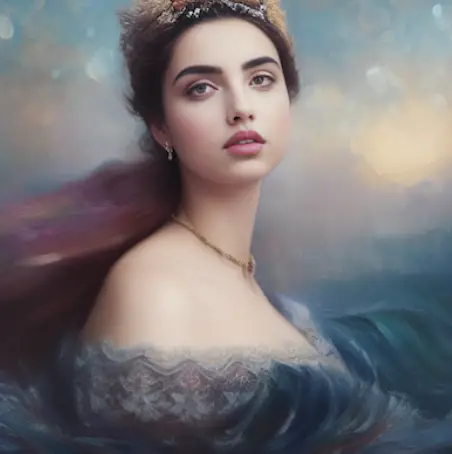
Output using HARDBlend:
Same prompt, different output with HardBLEND
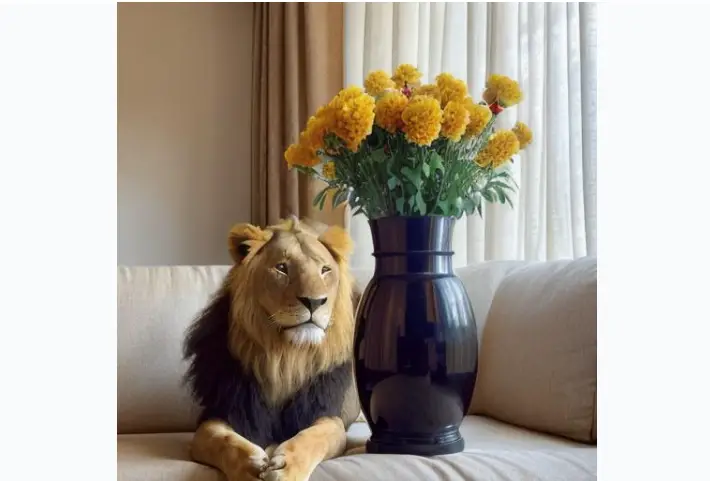
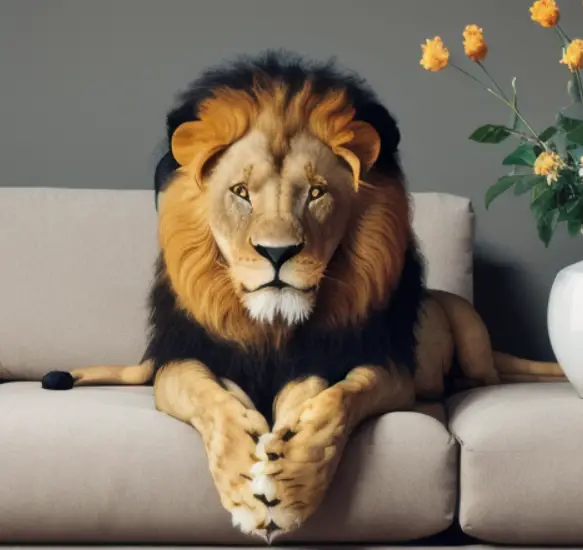
Conjuring an Image of a Lion in the Living Room with HardBLEND Stable Diffusion
Prompt:
“Photographic image of a lion sitting on a couch, with a vase of flowers in the room. The image should exhibit depth of field and film grain, imitating the style of a Fujifilm XT3 shot. The setting should be a dark studio, and the image should be ultra-clear, 8K UHD quality.”
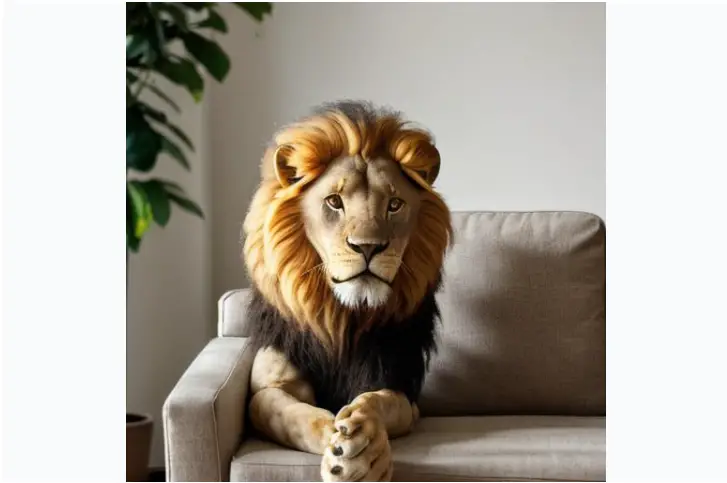
As you experiment with this prompt, remember that Stable Diffusion can create a wide range of images, so feel free to adjust the prompt to best fit your creative vision.
Same prompt – different result with HardBLEND
Manifesting an Image of a Witch with HardBLEND Stable Diffusion
Prompt:
“A witch with an intricately detailed face, displayed in a half-body shot. The lighting should be typical of a studio, with an emphasis on dramatic illumination. She is dressed in highly detailed clothing, and her gaze is directed at the viewer, creating an air of mystery. The scene is further enhanced with a full moon and beautiful fire magic. The image should be void of any youthful, immature, disfigured, or deformed appearances.”

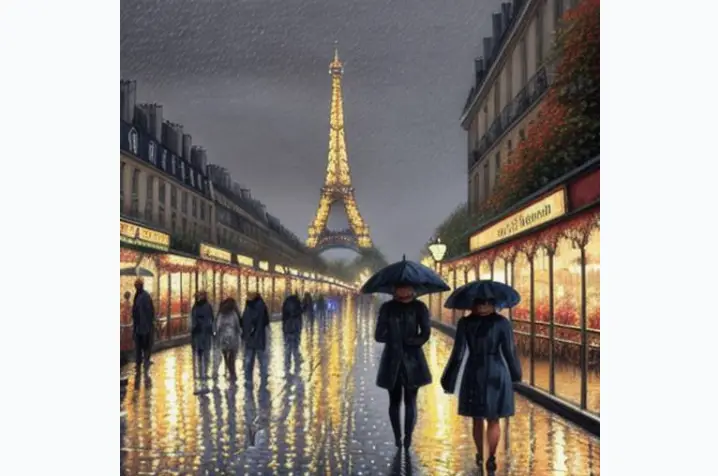
Depicting Paris in a Rainy Fall with Stable DIffusion 2.1 Prompt
Prompt:
“A depiction of autumn in Paris, with the city lights illuminating a market, all under a beautiful, atmospheric rainfall. The image should evoke the style of Thomas Kinkade’s art. The image should avoid any elements that are ugly, tiled, or poorly drawn, particularly hands, feet, and faces. The image should not include any out of frame bodies or extra limbs, nor any disfigurement or deformation. Watermarks, signatures, and cut-off images are to be avoided. The image should not suffer from low contrast, underexposure, overexposure, or depict poor artistic skill or amateurish elements, especially a distorted face.”
This prompt will guide Stable Diffusion 2.1 in creating a visually pleasing representation of a rainy autumn in Paris. The model will avoid producing images that are visually unpleasing or artistically poor. This is an excellent prompt for exploring the ability of Stable Diffusion to create atmospheric, detailed cityscapes.
As you experiment with Stable Diffusion, this prompt provides an exciting opportunity to explore the creation of character portraits with a touch of fantasy. Remember, the model used here is Lyriel v1.5, which may yield different results from other models. Enjoy your creative journey!
These prompts are designed to give you a starting point and inspiration. Feel free to modify them as per your requirements and artistic vision. Remember, the goal is to experiment, learn, and most importantly, have fun with Stable Diffusion!
Happy creating!
Understanding Stable Diffusion Custom Models
When discussing the world of Stable Diffusion, it’s important to understand the distinction between base models and custom models. The official models, released by Stability AI and their partners, fall into the category of base models. These include well-known iterations such as Stable Diffusion 1.4, 1.5, 2.0, and 2.1.
Stable Diffusion v1.4 vs v1.5 Images
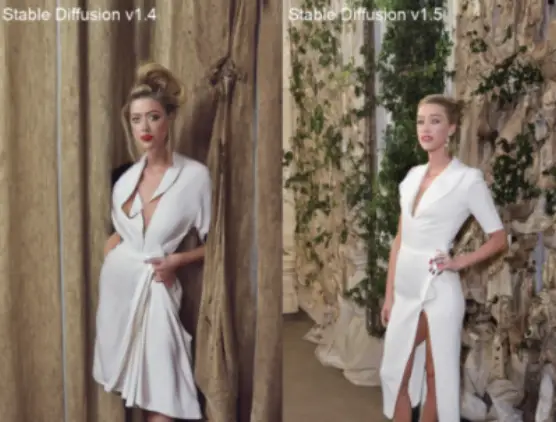
Custom models, however, are a different breed. These are offshoots of the base models, and in most cases, they are trained from either v1.4 or v1.5 models. To create a custom model, additional training is conducted using specific datasets. This additional data enables the creation of images in particular styles or of certain objects.
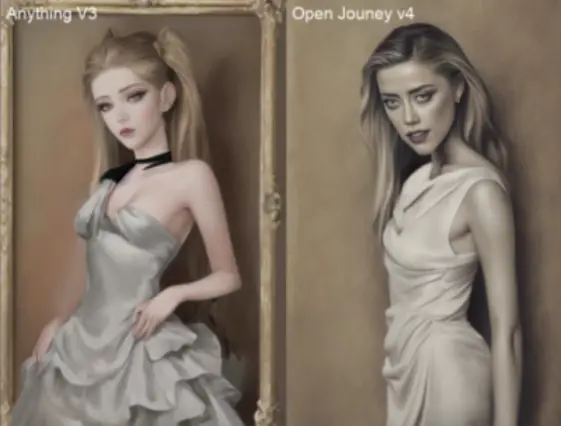
The potential with custom models is truly limitless. They can be programmed to generate images in a variety of styles – from anime and Disney to emulating the style of another AI entirely. This versatility opens up a whole new world of possibilities for AI image generation.
Comparison of images generated by Anything v3 and Open Journey v4.
To illustrate this, consider the comparison of five different models below. Each model generates a unique set of images, showcasing the wide range of styles and outputs that can be achieved with custom models.
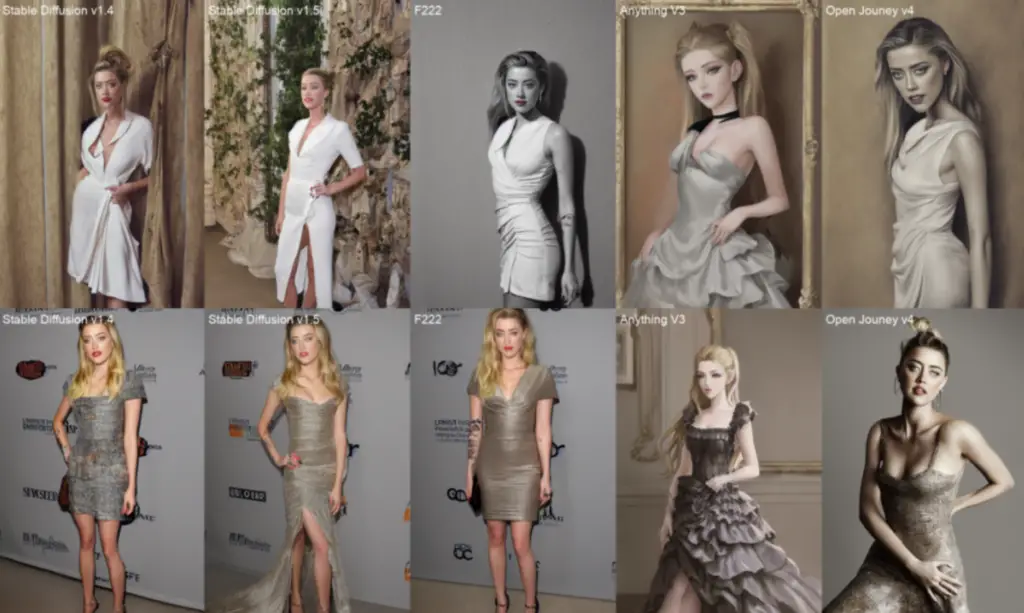
Interestingly, it’s not just about using one model or another. In fact, it’s entirely possible to merge two models to create an intermediate style. This allows for even greater flexibility and creativity in image generation. The world of Stable Diffusion is truly a playground for those interested in AI image generation.
Which Stable Diffusion Model Should You Choose?
Best Stable Diffusion Model to Utilize
If you’re just starting to dip your toes in the world of Stable Diffusion, it’s generally recommended to begin your journey with the base models. These models offer a plethora of learning opportunities and experimental capabilities, enough to keep you engrossed for several months.
The base models are bifurcated into two major groups: Stable Diffusionv1 and Stable Diffusionv2. The v1 category encompasses the 1.4 and 1.5 models, whereas the v2 category comprises the 2.0 and 2.1 models.
At first glance, one might naturally gravitate towards the more recent v2 models, assuming they offer advanced features or better output. However, it’s important to note that the AI community is still in the process of mastering these newer models. Moreover, the quality of images generated by the v2 models doesn’t necessarily outshine those produced by the v1 models.
Therefore, for those who are navigating the waters of Stable Diffusion for the first time, it’s advisable to start with the Stable Diffusion v1.5 model. It serves as an excellent launching pad for new users, balancing usability with impressive results.
Crafting Your Own Stable Diffusion Model: Training Techniques
One of the major selling points of Stable Diffusion is the degree of control it provides over the model. This flexibility allows you to tailor your own model, imbuing it with a unique style that sets it apart. There are two primary methodologies you can employ to train models: Dreambooth and Embeddings.
Dreambooth is often considered the more powerful of the two. This technique fine-tunes the weights of the entire model, providing nuanced control over its learning process and, therefore, the output.
On the other hand, Embeddings doesn’t alter the model per se. Instead, it identifies and utilizes specific keywords to depict the new subject or style. This method can be particularly useful when you want to introduce specific stylistic elements or themes in your generated images without modifying the foundational structure of your model.
By understanding and applying these techniques, you can experiment with creating a vast array of unique and compelling AI-generated images.
The Role of Negative Prompts in Stable Diffusion
Prompts are instrumental in guiding the Stable Diffusion AI to generate the desired image by outlining what elements you want to be included. Conversely, negative prompts serve as an effective tool to exclude unwanted elements from the generated image. However, it’s important to note that support for negative prompts is not universally provided across all Stable Diffusion services.
Despite this, for v1 models, negative prompts can be an incredibly valuable tool, helping to refine the output further. When it comes to v2 models, the use of negative prompts becomes absolutely crucial, significantly influencing the quality and accuracy of the resultant images.
Even for those just starting their journey with Stable Diffusion, the use of a universal negative prompt can greatly enhance the control over the image generation process, leading to more satisfactory results.
For more information on negative prompts, consider exploring this guide on Stable Diffusion prompts we prepared for you.
Producing Large-Scale Prints with Stable Diffusion
Stable Diffusion’s inherent resolution for v1 models is set at a pixel configuration of 512×512. It’s essential to stick closely to these proportions when generating images, to ensure optimal results. Here’s a straightforward guide to sizing your initial image:
For landscape-oriented images: Retain the height at 512 pixels, while extending the width to a higher value, for instance, to 768 pixels. This adjustment will achieve a 2:3 aspect ratio, perfect for landscape images.
For portrait-oriented images: Maintain the width at 512 pixels, while escalating the height, potentially to 768 pixels. This change will realize a 3:2 aspect ratio, well-suited for portrait images.
It’s important to note that setting the initial width and height too high could lead to repeated subjects appearing in the image, disrupting the overall composition.
Once the image generation is complete, the subsequent step is to upscale the image. The freely available AUTOMATIC1111 GUI is equipped with a number of popular AI upscalers to assist in this process, making the transition to larger prints seamless and efficient.
Mastering and Controlling Image Composition with Stable Diffusion
As Stable Diffusion technology propels forward with an accelerated momentum, it presents a suite of robust techniques to exercise control over image composition.
Stable Diffusion Image-to-Image Conversion (img2img)
This approach permits Stable Diffusion to emulate the composition of an input image while generating an entirely new one. For instance, you could use an image of an eagle as an input, and instruct the AI to produce an image of a dragon, with the resultant image echoing the composition of the original eagle image.
Eagle Image BEFORE
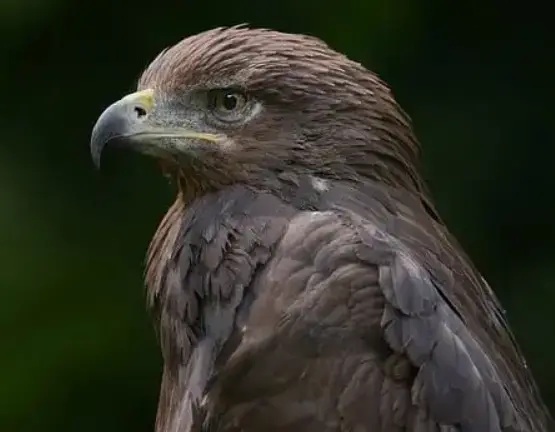
Eagle Image Converted to a Dragon AFTER
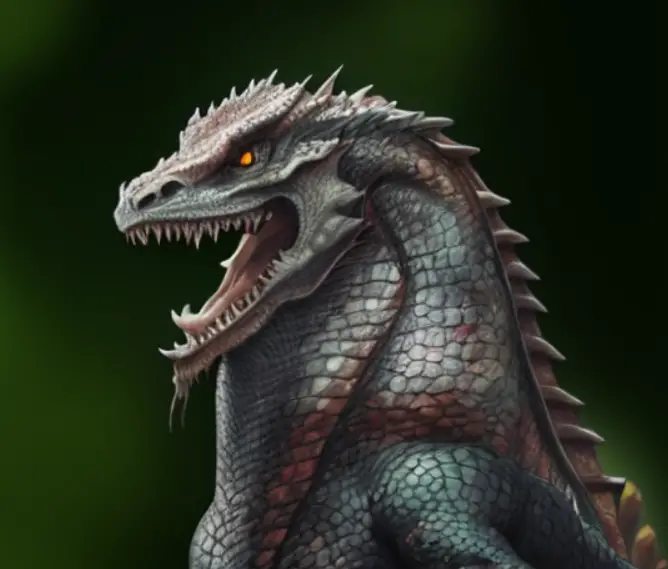
This method allows for artistic transmutations of shapes and forms while keeping the compositional integrity intact. Pretty powerful stuff!
The Role of ControlNet in Stable Diffusion
With ControlNet, you can have even more fun. ControlNet operates in a manner akin to the image-to-image method, but with an added advantage. It can extract specific data from the input image, such as human poses.
Add an input image of a person in a white dress
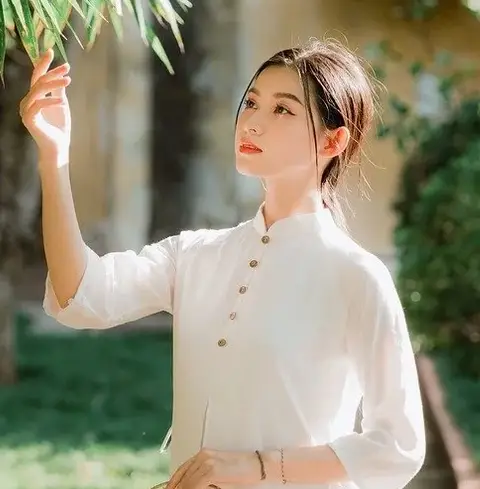
Convert it into a person holding an eagle with a completely different background and image details.
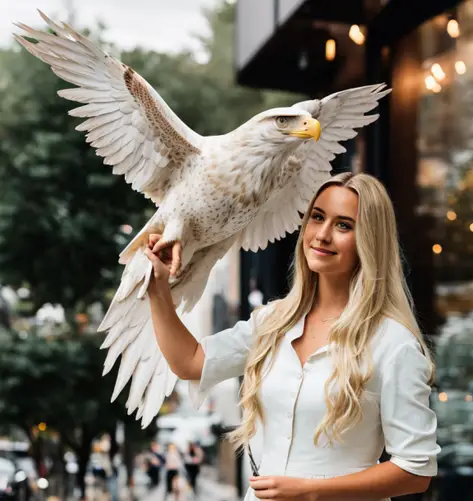
Hard to believe these 2 were the same image in origin.
This enables the creation of images that replicate poses from the input, unlocking a realm of creative potential. In addition to human poses, ControlNet can also extract other specific information, such as outlines, which can prove beneficial in various artistic scenarios.
The Regional Prompting Technique in Stable Diffusion
With the innovative extension known as the Regional Prompter, you can designate prompts for distinct parts of the images. This strategy proves especially useful when you aim to position particular objects in specific areas of the image.
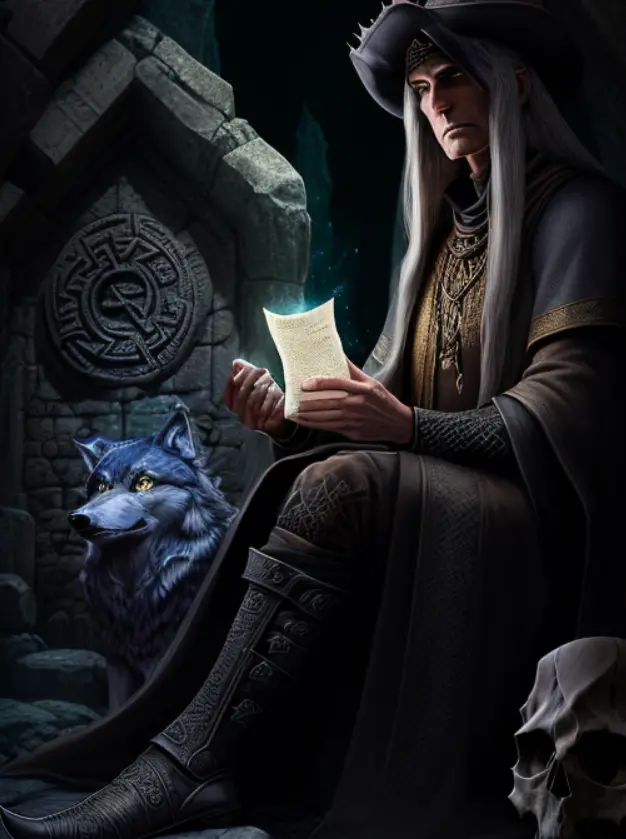
As an example, you could locate a wolf at the bottom left corner and skulls at the bottom right corner of an image, crafting a dynamic composition with narrative elements.
Depth-to-Image Manipulation in Stable Diffusion
The depth-to-image technique provides yet another avenue to manage the composition of an image via an input image. This method can discern the foreground and background of the input image, and the resultant image will mirror this same foreground and background layout.
Try it with an image of a famous couple from a famous movie, dancing.
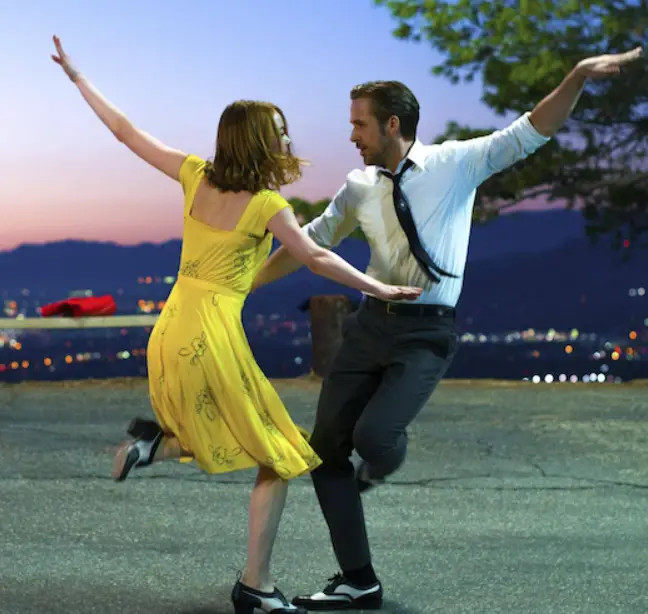
Their photo was converted into an image:
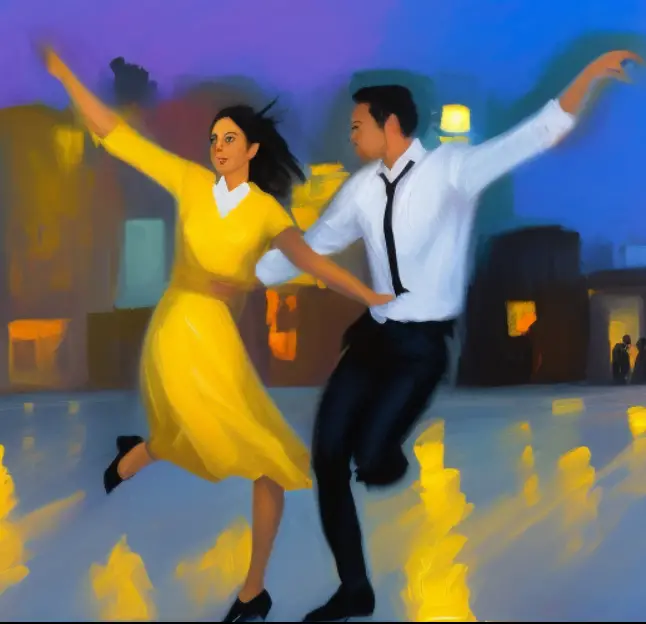
This tool enables the maintenance of consistent spatial relationships between elements in the scene, a crucial factor in maintaining realism or achieving desired artistic outcomes.
Crafting Specific Subjects with Stable Diffusion
Stable Diffusion stands out as a remarkable tool for creating highly realistic images for specific subjects. From crafting detailed human portraits that mirror the intricacies of a photograph, to generating a vast array of animal imagery that captures the diversity of the animal kingdom, Stable Diffusion opens up a world of possibilities.
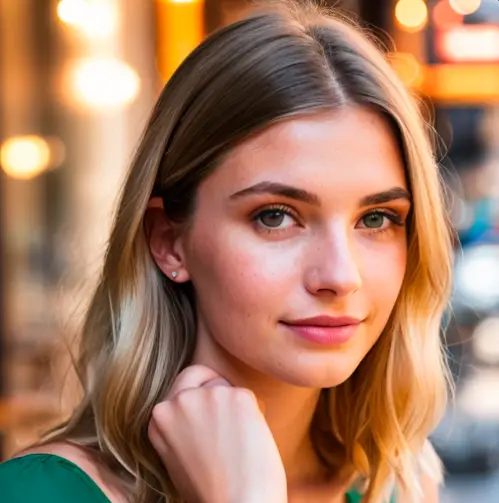
Use Stable Diffusion to Create Realistic Human Portraits
Harnessing the power of Stable Diffusion, you can generate strikingly realistic human portraits, closely resembling photographs. This cutting-edge tool uses intricate algorithms and vast data sets to comprehend the subtle nuances of human features and expressions.
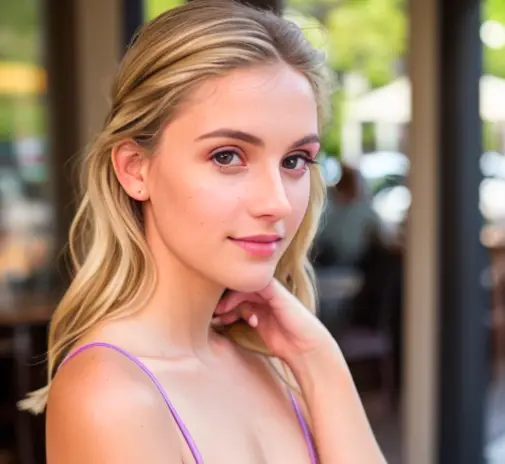
Here’s the interesting part: creating these photo-realistic images is as much an art as it is a science. It comes down to using the right prompt – a description or phrase that guides the AI in the desired direction.
Moreover, the use of specialized models, trained specifically to produce photo-style realistic humans, is crucial. These models have been optimized through extensive training on diverse datasets, enabling them to generate images that capture the unique attributes and diversity of human faces.
To understand the process in detail and generate realistic human images yourself, refer to the dedicated tutorial on this subject. Here, you’ll find step-by-step instructions, tips, and examples that will help you navigate this exciting terrain.
How to Create Animal Imagery with Stable Diffusion
One of the most popular applications of Stable Diffusion is the creation of animal imagery. From common household pets to exotic wildlife, the AI’s ability to generate detailed, realistic images of animals is indeed remarkable.
AI-generated image of a lion sitting on a couch.
Animal images generated by Stable Diffusion can range from adorable kittens to majestic elephants. Whether you’re looking to create an image of a soaring eagle or a galloping horse, Stable Diffusion can help you bring your vision to life.
However, creating these images requires a clear understanding of how to guide the AI effectively. This involves using appropriate prompts and adjusting the parameters of the AI model correctly.
AI-generated image of a peacock on sandy dunes.
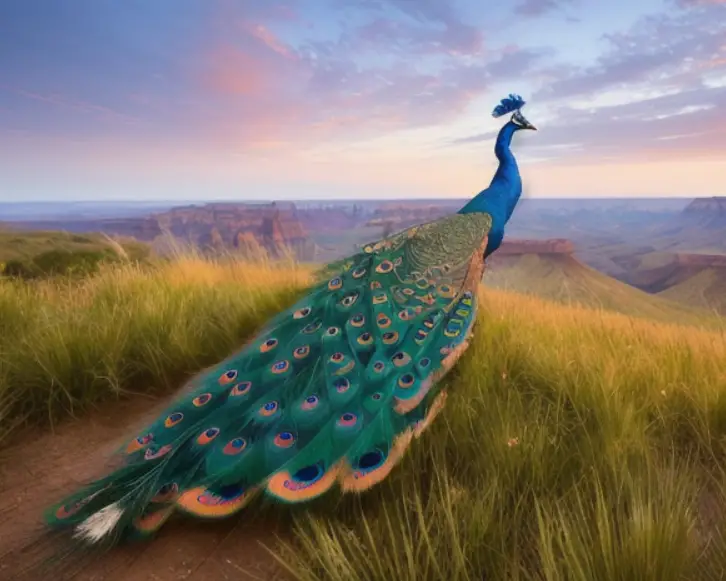
To assist you in this task, there’s a comprehensive tutorial on generating animal images. This guide will walk you through the process, provide useful tips, and inspire you with captivating examples.
Dive Ever so Deeper into the World of Stable Diffusion: A Comprehensive Guide for Beginners (and Professionals)
Captivated by the realm of artificial intelligence (AI) image generation and its recent massive developments? Have you ever wondered how to leverage the power of Stable Diffusion for creating mesmerizing images? This comprehensive guide to Stable Diffusion is crafted just for you.
In this second part of our series, we’ll lay a strong foundation on which you can build your Stable Diffusion knowledge and understand its origins. We’ll explore the essentials, advantages, setup process, and wide-ranging capabilities of Stable Diffusion. Read on to tap into the immense potential of this fascinating AI tool developed by the Machine Vision & Learning Group led by computer scientist Björn Ommer.
What is Stable Diffusion?
Stable Diffusion is a revolutionary AI-based tool that breathes life into your ideas, transforming simple text prompts into stunning images. Whether you want a photorealistic image that could fool a camera, or an artistic creation worthy of an exhibition, Stable Diffusion has got you covered. One of the most significant benefits of this tool is that it’s free to use on your personal Windows or Mac computers.
Why Choose Stable Diffusion?
In the world of AI-driven image generation, there are several services like DALL-E and MidJourney. So, why should you opt for Stable Diffusion? The answer lies in its unique advantages. It’s an open-source tool with a community of enthusiastic developers who continually create and share new tools and models. Moreover, it’s designed for low-power computers, making it cost-effective to run.
The Power of Stable Diffusion: What Can It Do?
Stable Diffusion is not just an AI image generator; it’s a tool that can transform the way you perceive and create art. It offers a plethora of capabilities, some of which are:
- Generate images from the text:
The primary function of Stable Diffusion is to convert text prompts into images. Whether you’re looking for an anime style, a photorealistic image, a fantasy scene, or a representation of animals, Stable Diffusion can do it all. - Generate an image from another image:
Stable Diffusion can transform one image into another, a process known as image-to-image generation. This could be as simple as turning a hand-drawn apple into a photorealistic one. - Photo editing:
Stable Diffusion also allows you to regenerate part of an AI or real image, akin to Photoshop’s generative fill function. - Make videos:
You can use Stable Diffusion to create videos either from a text prompt or another video.
In the next part of this Stable Diffusion overview guide, we’ll delve deeper into the usage and advanced features of Stable Diffusion. Learn more about the research behind the Stable Diffusion science that drives this AI Image Creation Machinery!
Frequently Asked Questions about Stable Diffusion Quick Start Guide
Q1: What is Stable Diffusion?
Stable Diffusion is a type of AI model that can generate images from textual descriptions. It’s part of a broader category of AI technologies known as text-to-image models.
Q2: How do I build a good prompt for Stable Diffusion?
When crafting a prompt, be as detailed and specific as possible about the elements you want to be included in the image. The use of relevant keywords can also help steer the image in the desired direction.
Q3: What parameters can I change in Stable Diffusion?
Several parameters can be adjusted in Stable Diffusion, including image size, sampling steps, CFG scale, and seed value. Each of these parameters can impact the quality and characteristics of the generated image.
Q4: How many images should I generate when testing a prompt?
It’s recommended to generate multiple images when testing a prompt. This helps you better understand the potential outcomes of a prompt and increases the chance of getting a satisfactory result.
Q5: How do I fix defects in the images generated by Stable Diffusion?
There are several methods to fix image defects, including face restoration and inpainting. These techniques can help address common issues like artefacts in the faces generated by Stable Diffusion.
Q6: What are custom models in Stable Diffusion?
Custom models in Stable Diffusion are derived from base models and are trained with additional data to generate images of specific styles or objects.
Q7: What is a negative prompt in Stable Diffusion?
Negative prompts in Stable Diffusion help specify what you don’t want to see in the image. They can be particularly useful for guiding the AI away from unwanted image features.
Q8: Can I use Stable Diffusion to create large print images?
Yes, Stable Diffusion can generate images that can be upscaled for large prints. However, the initial image dimensions should not deviate too much from the model’s native resolution.
Q9: Can I control the composition of the image with Stable Diffusion?
Yes, Stable Diffusion offers several methods to control image composition, including image-to-image transformation, ControlNet, regional prompting, and depth-to-image techniques.
Q10: What are some common subjects I can generate with Stable Diffusion?
Stable Diffusion can generate a wide range of subjects, including realistic human portraits, animals, and other objects based on the detailed description provided in the text prompt.
Q11: Can Stable Diffusion generate anime-style visuals?
Yes, certain models like the ‘Anything v3.0’ are specifically designed to generate Anime-style visuals.
Q12: How can I train a new model with Stable Diffusion?
You can train a new model using either Dreambooth or embedding. Dreambooth fine-tunes the weights of the whole model, while embeddings leave the model untouched but find keywords to describe the new subject or style.
Q13: Can Stable Diffusion create photorealistic images?
Yes, certain models like ‘Realistic Vision v2.0’ specialize in crafting images with a photorealistic touch.
Q14: Can I control the lighting in the images generated by Stable Diffusion?
Yes, incorporating lighting terms like ‘cinematic lighting’, ‘studio lighting’, and ‘sunlight’ in your prompts can add drama and aesthetic appeal to the generated image.
Q15: Can I use Stable Diffusion to generate images from an artist’s style?
Yes, by using the names of artists or websites known for their distinctive styles in your prompt, you can guide the style of the image generated by Stable Diffusion.
Q16: How can I make a large print with Stable Diffusion?
You can upscale the image generated by Stable Diffusion to make large prints. However, be careful not to deviate too much from the model’s native resolution when setting the initial image dimensions.